← Return to Home
Figma Text Style
Table of Contents
Manually Create Text Style
Using Text Style functionality will help us apply repeated collection of properties (line height, font weight, size) to text object in Figma. We're gonna learn first on how can we create text style in Figma without any plugins.
To get started, create a new Figma file and follow the steps below
- Add Frame by pressing F on your keyboard
- or click the frame icon beside the pointer icon from the menu options and then select from the options on the right side that are available. For this tutorial I will be selecting the Desktop 1440 x 1024.

- Add a text by pressing T on your keyboard or from the text icon on the menu options. You can type in any text that you want. Set the font size to 16 and font weight to Regular.

- Duplicate this text three times for this tutorial. To duplicate you can hold Shift + Alt on your keyboard then click and drag the text below. Then you can simply press Ctrl + D to repeat the copy. Modify the weight property of the second text and change it into
MediumandBoldfor the third text.

- Select the first text that you've created and on the right side click the four dot icon on the Text (located below the Layer section)

- Now type in the name
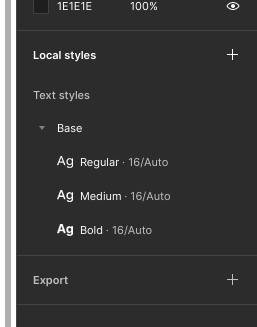
Base/Regularwe named it with this format because this will automatically group our text styles based on the first Text which is theBase. We also added aRegularbecause our font weight is Regular. Now repeat the process and for the second text name it asBase/Mediumand the third text asBase/Bold.


Now you can click on the blank space on the canvas to see the Local styles which has our Text styles.

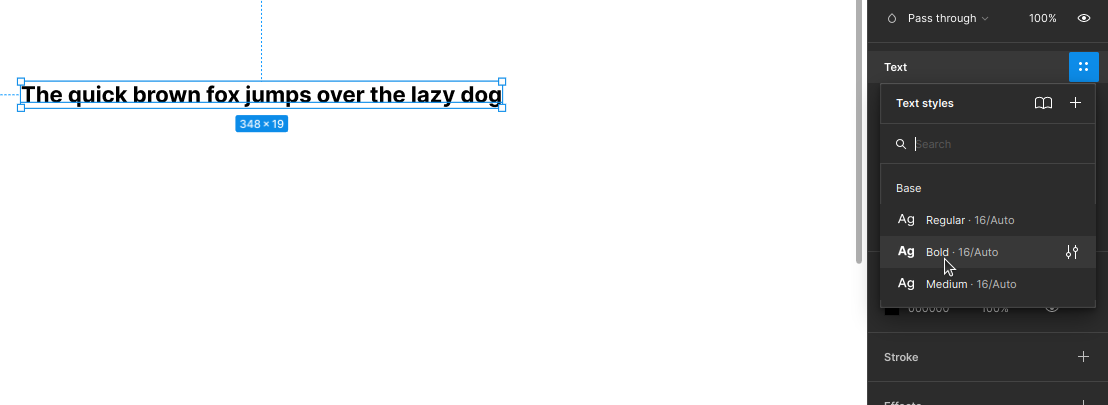
To use the text styles you can add a new text by pressing T on your keyboard and type in any text that you want and select the four square dot icon on the Text from the right side panel. Simply select from any of the text style that you created and it will apply the properties that you have set.
 .
.